Aurum key rebinding and input
The Controls page shows a row for each player mappable key in your Enhanced Input setup.
Setting it up
Section titled “Setting it up”-
Enable Project Settings > Engine > Enhanced Input > User Settings (Enable User Settings).
-
Give your Input Actions Player Mappable Key Settings with a Name, Display Name and Display Category.
-
Register your mapping context with Enhanced Input User Settings > Register Input Mapping Context, for example on Begin Play of your player controller.
How the rows behave
Section titled “How the rows behave”- Keyboard and mouse rows have a primary and a secondary slot and are grouped by Display Category. Gamepad mappings get their own Gamepad Bindings section, and the controller layout shows them.
- Select a slot and press Enter or A, then press the new key. Escape, or B, cancels.
- A key that is already in use moves to the new action, so keys never double up.
- Delete, Backspace or gamepad X clears a slot. Reset Key Bindings restores the defaults.
- Interaction prompts that use an Input Action show the key it is bound to now, so the HUD follows rebinding too.
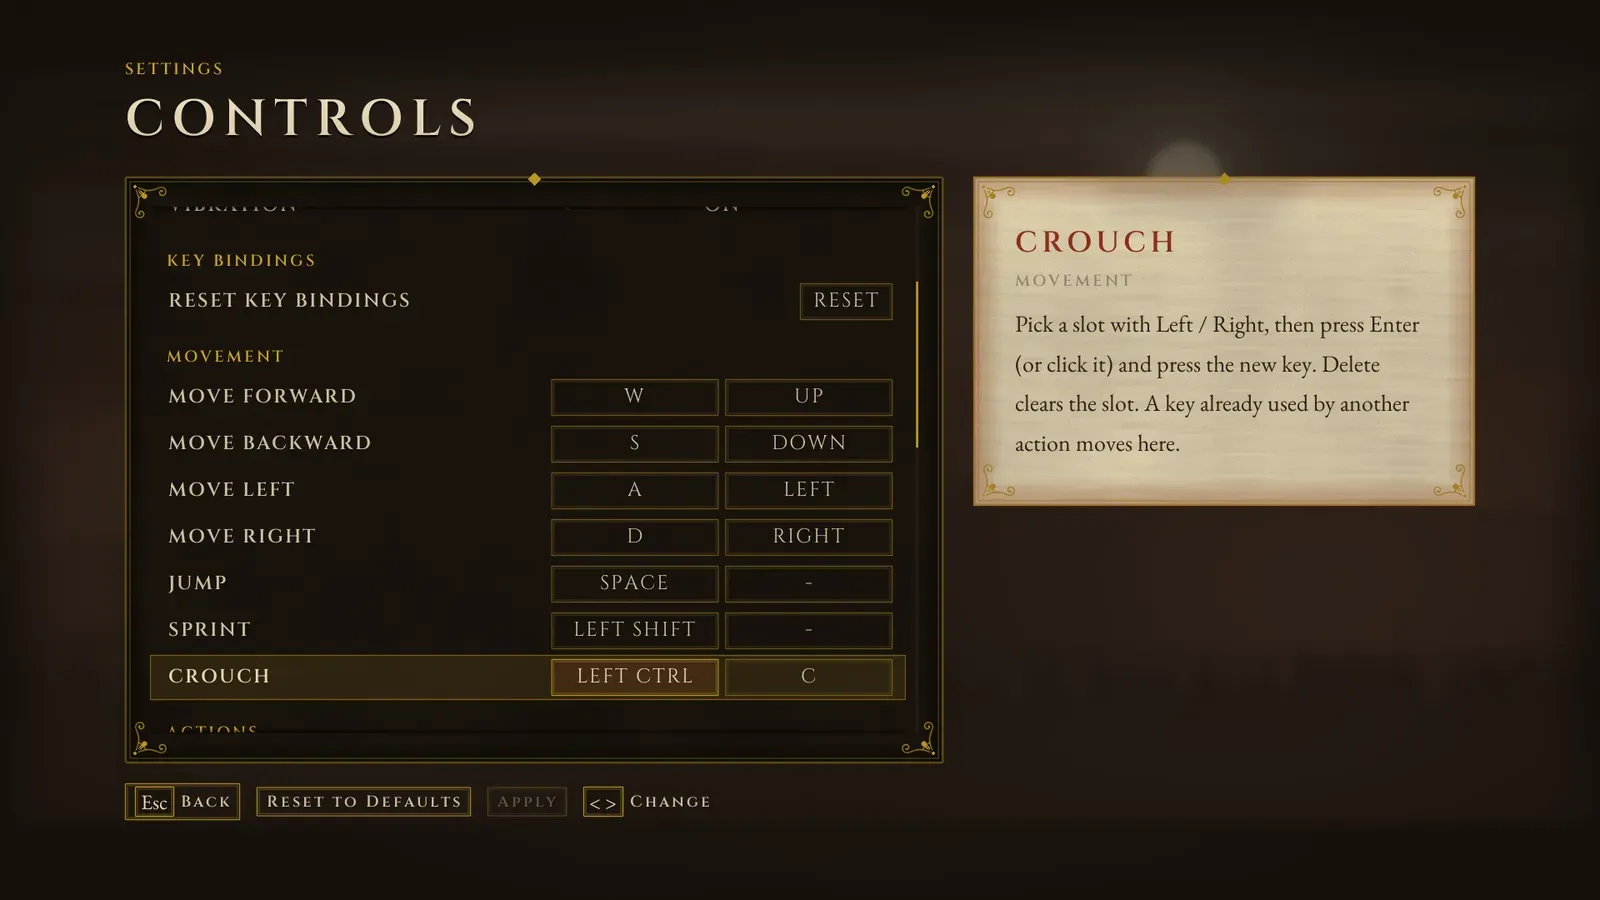
Keyboard and mouse rows, grouped by their Display Category, with two slots each.
The key profile class
Section titled “The key profile class”The plugin selects its own key profile class (AFMPlayerMappableKeyProfile), so a cleared binding, or a button moved to another action, stays unbound in game.
If your project sets its own Default Player Mappable Key Profile Class, derive it from AFMPlayerMappableKeyProfile.
The controller layout
Section titled “The controller layout”AFMControllerLayoutScreen draws a gamepad and, for every button, a line to what it does. The callouts are the gamepad bindings of the player’s rebindable actions, so the diagram follows rebinding. Inputs that are not rebindable rows take their labels from Menu Config > Controller Layout Labels, which holds Move, Look and Pause Menu by default. Y, or the Change Bindings hint, opens the Controls page.
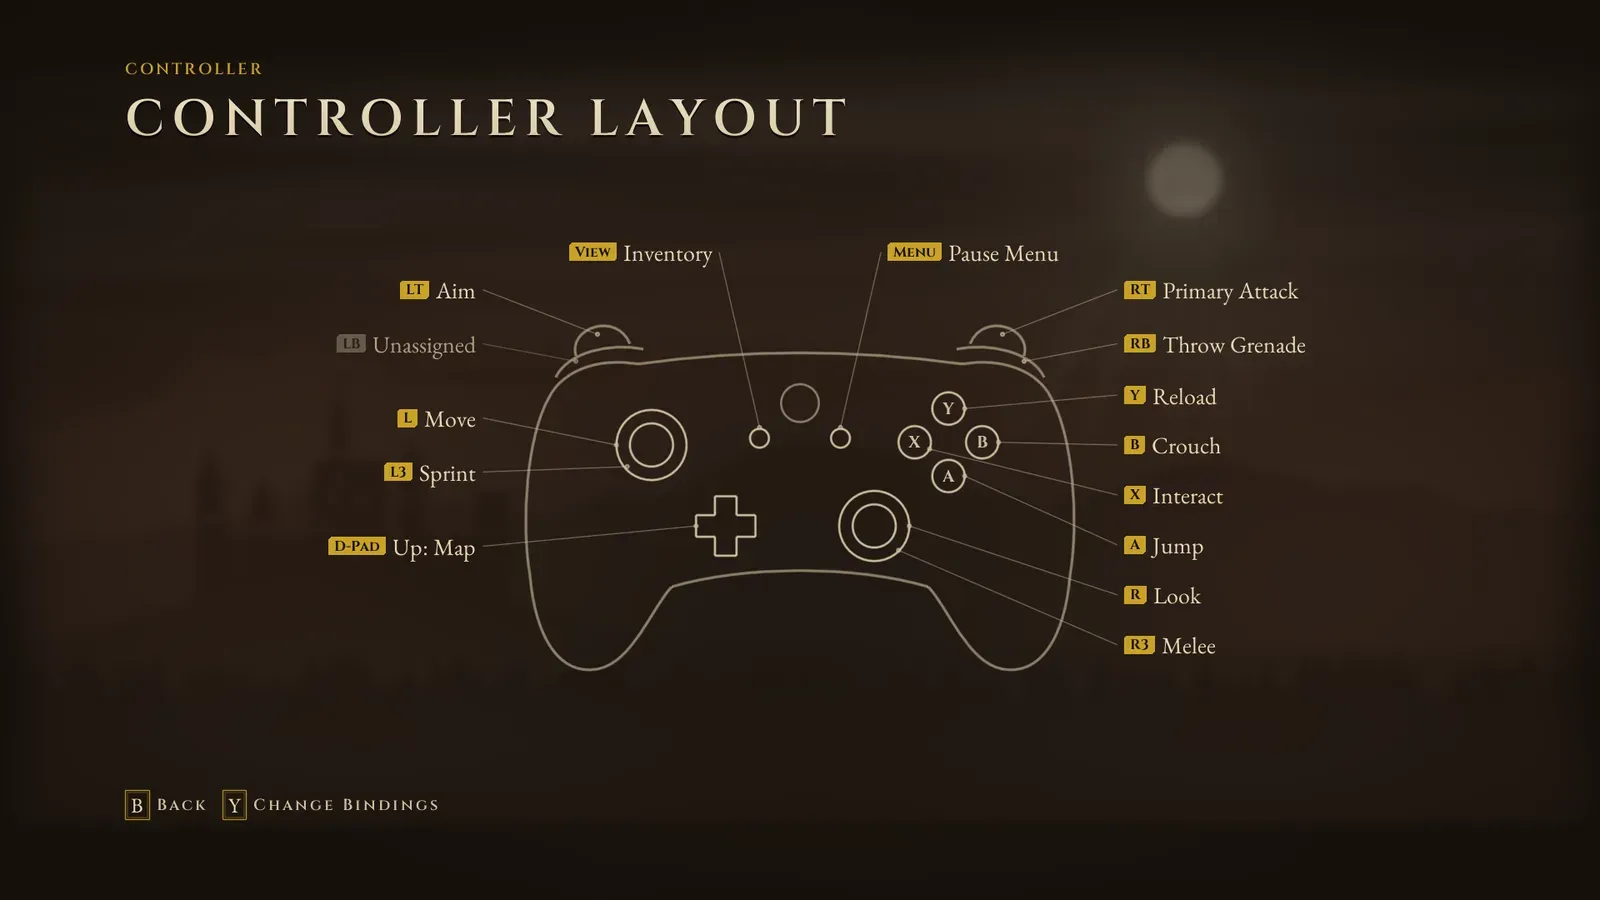
The controller layout. Each callout is a gamepad binding, so it follows rebinding.
The diagram itself (AFMGamepadDiagram) is a widget you can use on its own: give it callouts with Set Callouts.
Mouse, keyboard and gamepad
Section titled “Mouse, keyboard and gamepad”| Device | Controls |
|---|---|
| Mouse | Hover moves focus, so exactly one item is lit at a time. Click to select. Footer hints that do something (Back, Reset to Defaults, Apply, the tab keys) are buttons. |
| Keyboard | Arrows navigate, Enter or Space select, Escape goes back, Left and Right change values, Q and E turn tabs and pages. |
| Gamepad | D-pad or left stick navigate, A selects, B goes back, LB and RB turn tabs and pages, Y resets a settings page (and randomises a character, takes a photo), Start opens and closes the pause menu. |
- Hints show the key or controller button for the input in use, on small plaques. HUD prompts do the same.
- Picking up a gamepad, or going back to the keyboard, keeps focus where it is.
- No CommonUI input data asset is needed. The plugin handles navigation and Back itself.
Gamepad button names
Section titled “Gamepad button names”Button names follow Menu Config > Gamepad Labels:
| Button | Xbox | PlayStation | Nintendo |
|---|---|---|---|
| Bottom / right / left / top face | A, B, X, Y | Cross, Circle, Square, Triangle | B, A, Y, X |
| Shoulders, triggers | LB, RB, LT, RT | L1, R1, L2, R2 | L, R, ZL, ZR |
| Stick buttons | L3, R3 | L3, R3 | L Stick, R Stick |
| Special left / right | View, Menu | Create, Options | -, + |
Auto, the default, follows the controller in use. DualSense and DualShock read as PlayStation and Switch controllers as Nintendo, and Xbox names are used when the controller is unknown.